
3 Ways to Record Your Mac Screen with Audio
Are you geared up to take a wild plunge into the riveting universe of Mac screen recording? Picture this: you’re about to create tutorials that make even your cat understand quantum physics, capture gameplay so epic it’ll have you nominated for a gaming Oscar, or simply record your screen for reasons only known to your pet goldfish. And guess what? You can now add audio to all that visual goodness! In this super-duper guide, we’re about to unveil three wizard-level methods to make your Mac screen sing with audio. So, strap in, grab your popcorn (or earmuffs for your cat), and let’s embark on this audio-infused adventure!
But How Do You Record Mac Screen with Audio?
Great question! There are several methods to achieve this, each with its own advantages. Let’s explore five of them.
1. Using Built-in macOS Tools
Difficulty Level: Beginner
If you’re new to screen recording and prefer a straightforward approach, macOS provides built-in tools that can get the job done without any third-party software. To record your Mac screen with audio using these tools, follow these steps:
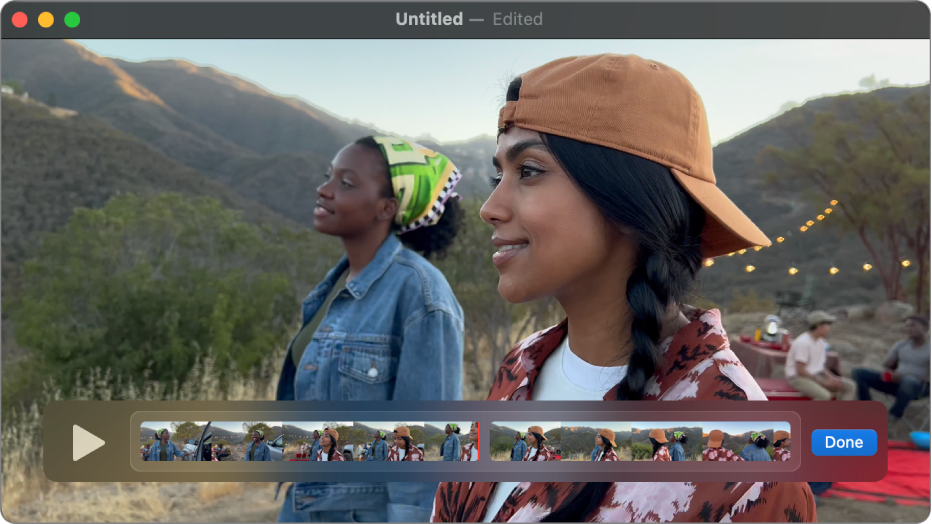
- Open QuickTime Player: You can find it in your Applications folder.
- Go to File > New Movie Recording: This will open your Mac’s webcam by default, but don’t worry; we’re interested in the screen recording feature.
- Adjust Settings: Click the arrow next to the record button and select your microphone for audio input. You can also choose the quality and frame rate settings.
- Start Recording: Click the red record button to begin recording your screen.
- Stop Recording: When you’re finished, click the stop button in the menu bar, and QuickTime will save your recording.
Pros:
- Ease of Use: Built-in macOS tools like QuickTime Player are readily available on your Mac, making them incredibly convenient for beginners who don’t want to download or purchase additional software.
- No Cost Involved: Since these tools come bundled with your Mac, you don’t need to spend any extra money on screen recording software.
- Reliable Screen Capture: macOS tools generally provide stable and reliable screen capture without significant performance issues.
- Basic Editing Features: QuickTime Player allows for basic video trimming and editing, which can be handy for quick adjustments.
- System Integration: These tools seamlessly integrate with the macOS environment, ensuring compatibility and smooth operation.
- Ideal for Simple Needs: If you have straightforward screen recording requirements, such as recording a short tutorial or a software demonstration, built-in tools can get the job done efficiently.
Cons:
- Limited Features: macOS tools offer only basic screen recording features. You won’t find advanced capabilities like video editing, annotations, or live streaming support.
- Lack of Flexibility: You might encounter limitations in terms of customizing recording settings, such as choosing specific codecs or adjusting frame rates.
- Audio Recording Options: While you can record audio using built-in tools, the options for fine-tuning audio settings are limited compared to third-party software.
- No Webcam Overlay: If you need to overlay your webcam video on your screen recording, you’ll need to use additional software, as this feature is not available in macOS tools.
- Export Options: The export options in built-in tools may not be as versatile as those in dedicated screen recording software, limiting your ability to choose different formats or quality settings.
- Advanced Users May Require More: If you’re an advanced user or need to create professional-quality content, you might find the built-in macOS tools lacking in terms of advanced features and customization.
You can also use the keyboard shortcut Command (⌘) + Control (⌃) + N to start a new screen recording in QuickTime Player.
2. Using Third-Party Screen Recording Software
Difficulty Level: Intermediate
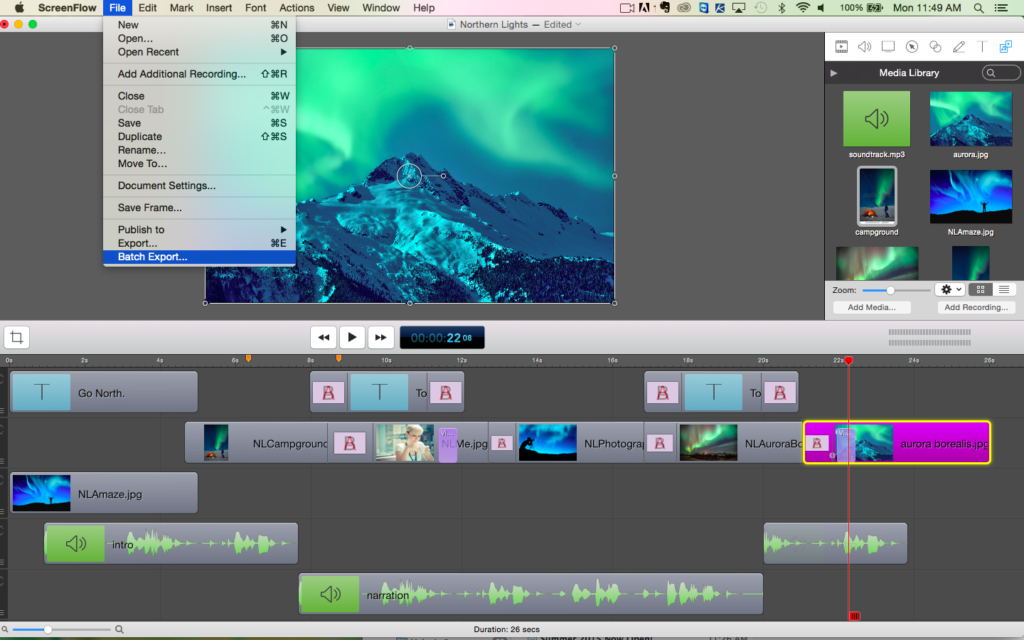
While macOS tools are handy, third-party software offers more advanced features and flexibility. One popular choice is ScreenFlow, a powerful screen recording and video editing software. Here’s how to record your Mac screen with audio using ScreenFlow:
- Download and Install ScreenFlow: You can find it on the Mac App Store or their official website.
- Open ScreenFlow: Launch the application.
- Create a New Project: Click on “New Document” and select a template or start from scratch.
- Adjust Recording Settings: Click on the recording options to select your screen area and audio source (microphone or system audio).
- Start Recording: Click the record button to begin capturing your screen and audio.
- Edit and Enhance: After recording, you can edit your video, add effects, annotations, and more using ScreenFlow’s built-in tools.
- Export Your Video: Once you’re satisfied, export your video in the desired format.
Pros:
- User-Friendly Interface: ScreenFlow is known for its intuitive and user-friendly interface, making it accessible for beginners and experienced users alike.
- High-Quality Recording: It provides the option to record your screen in high resolution, ensuring that your videos look crisp and professional.
- Audio Recording: ScreenFlow allows you to capture both system audio and microphone audio simultaneously, making it ideal for creating tutorials, gaming videos, and more.
- Video Editing Capabilities: It comes with robust video editing tools, including the ability to add text, annotations, transitions, and animations to your recordings.
- Built-In Stock Media Library: ScreenFlow offers access to a library of royalty-free media assets, such as stock footage, music, and sound effects, which can enhance your videos.
- Multi-Track Editing: You can work with multiple tracks, making it easier to overlay images, videos, or additional audio sources.
- Export Options: ScreenFlow provides various export options, including the ability to export in different video formats, upload directly to social media platforms, or save to cloud services.
- Advanced Features: It supports features like green screen (chroma keying), video motion effects, and animations, allowing for more creative and dynamic video productions.
Cons:
- Paid Software: ScreenFlow is not a free tool. While it offers a free trial version, the full-featured software comes with a price tag, which may not be suitable for users on a tight budget.
- Mac-Only: ScreenFlow is exclusively available for Mac users, which means Windows and Linux users won’t be able to utilize its features.
- Resource Intensive: Running ScreenFlow smoothly can be resource-intensive, particularly when dealing with high-resolution recordings and complex editing projects, which may require a powerful Mac.
- Learning Curve: Although it’s user-friendly, mastering all of ScreenFlow’s features and capabilities may take some time for beginners.
- Limited Compatibility: It may not be fully compatible with some third-party plugins or codecs, limiting your ability to expand its functionality.
- Updates and Support: Some users have reported issues with software updates and customer support, which can be frustrating if you encounter problems.
- Lack of Advanced 3D Effects: While ScreenFlow offers a range of video editing features, it may not be as well-suited for users who require advanced 3D effects or complex visual effects.
ScreenFlow also offers a free trial, so you can test it out before committing.
3. Using OBS Studio for Advanced Recording
Difficulty Level: Advanced
If you’re looking for a high degree of control over your screen recording, especially for live streaming or complex setups, OBS Studio (Open Broadcaster Software) is a fantastic choice. It’s free, open-source, and highly customizable. Here’s how to record your Mac screen with audio using OBS Studio:
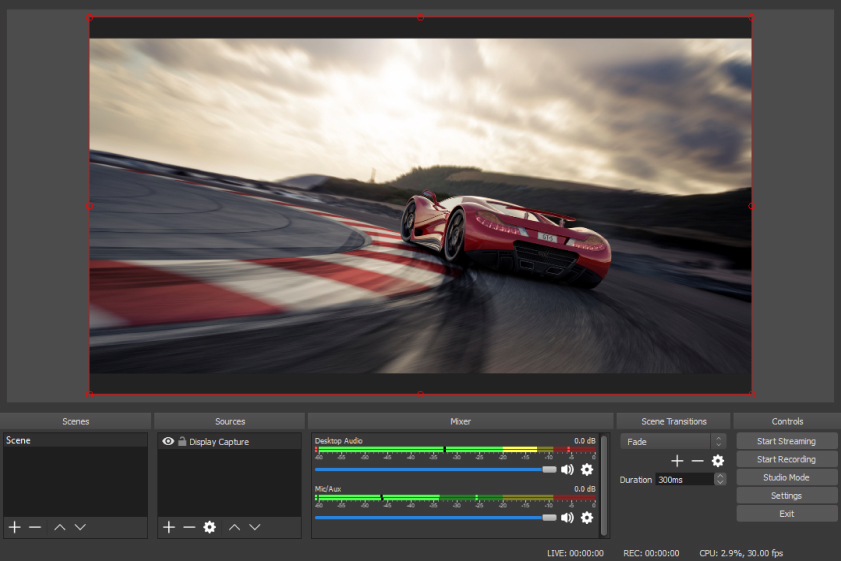
- Download and Install OBS Studio: Visit the OBS Studio website and grab the Mac version.
- Set Up Sources: In OBS, you’ll add sources like your screen capture and audio inputs. Click the “+” button under “Sources” to add them.
- Configure Audio: Under “Audio Mixer,” select your audio sources (microphone and system audio) and adjust their levels.
- Start Recording: Click “Start Recording” to begin capturing your screen with audio.
- Stop Recording: When you’re finished, click “Stop Recording.”
- Save or Stream: You can save the recording as a video file or stream it online, depending on your needs.
Pros:
- Free and Open Source: OBS Studio is completely free to use and open-source, making it accessible to users of all budgets.
- Cross-Platform Compatibility: It is available for Windows, macOS, and Linux, ensuring broad compatibility across different operating systems.
- Highly Customizable: OBS Studio offers extensive customization options, allowing users to configure their recording and streaming setups to suit their specific needs.
- Multiple Audio Sources: Users can capture multiple audio sources simultaneously, such as microphones, system audio, and additional audio devices, providing flexibility for content creators.
- Scene and Source Management: OBS Studio’s scene and source management system enables users to create complex layouts with various elements, making it ideal for live streaming and professional presentations.
- Supports Various Video and Audio Formats: It can record and stream in a wide range of video and audio formats, giving users flexibility in choosing the best format for their content.
- Numerous Plugins and Add-Ons: OBS Studio has a robust library of plugins and add-ons, expanding its functionality to cater to different use cases and requirements.
- Low Resource Usage: It is optimized for performance, and when configured correctly, it consumes relatively few system resources, making it suitable for most computers.
- Studio Mode: OBS Studio features a Studio Mode that allows users to preview changes before making them live, ensuring a polished and professional stream or recording.
Cons:
- Steep Learning Curve: For beginners, OBS Studio can be challenging to set up and use, especially when compared to more straightforward screen recording tools.
- Lack of Official Support: Since OBS Studio is open-source, it lacks official customer support. Users must rely on community forums and resources for troubleshooting issues.
- Complex Settings: The extensive settings and options can overwhelm novice users, leading to initial confusion and frustration.
- No Built-In Video Editing: OBS Studio is primarily a recording and streaming tool and does not offer advanced video editing features. Users may need separate software for post-production.
- No Direct Social Media Integration: Unlike some dedicated streaming platforms, OBS Studio does not have built-in integration with popular social media and streaming platforms. Users need to set up streaming destinations manually.
- Potential Bugs: Being open-source, OBS Studio may have occasional bugs or compatibility issues with certain hardware configurations.
- Resource Intensive with Complex Scenes: While it’s generally resource-efficient, creating complex scenes with numerous sources can strain system resources, potentially affecting performance.
OBS Studio offers an extensive array of plugins and settings for fine-tuning your recording and streaming experience.
In Conclusion
Recording your Mac screen with audio doesn’t have to be a daunting task. Whether you’re a beginner or an advanced user, there’s a method that suits your needs. The choice between built-in tools, third-party software, OBS Studio, screen capture apps, or web-based recorders depends on your specific goals and preferences.
So, what are you waiting for? Start recording, add that audio flair, and captivate your audience with engaging, informative content. The world is your digital canvas, and your Mac screen is your brush – go ahead and create your masterpiece!

Jeremy Brosius is a Senior Editor for Comeover.io, a leading tech website that focuses on PC hardware and gaming. With a deep passion for technology and an extensive knowledge of the PC hardware scene, Jeremy has become a well-known figure in the industry.
To contact the author, please reach out via email.