
Enhancing Your Windows 11 Workflow: How to Screenshot Efficiently
In the digital age, where information is abundant and attention spans are fleeting, visuals have become paramount in conveying messages quickly and effectively. Whether you’re a professional content creator, a diligent student, or someone who simply loves to share moments from their digital life, mastering the art of capturing and utilizing screenshots can significantly enhance your Windows 11 workflow. In this article, we’ll explore the ins and outs of efficient screenshot techniques, tools, and their applications, transforming your screen captures into compelling content.
The Power of Visuals: Why Screenshots Matter
Imagine trying to explain a complex process or demonstrate a software issue using only words. It’s like describing a painting to someone who’s never seen it – words might help, but visuals make the experience truly vivid. Screenshots bridge the communication gap by providing a tangible representation of what you’re discussing. They’re the visual cues that guide your audience through your digital narrative.
Windows 11 Screenshot Shortcuts
Windows 11 introduces a range of powerful screenshot shortcuts that empower you to capture specific sections of your screen effortlessly. The classic PrtScn button isn’t your only option anymore. The Win + Shift + S shortcut opens up a world of possibilities, allowing you to snip, sketch, and capture with precision.
The Importance of Efficient Screenshotting
Think about the last time you needed to explain a complex idea or troubleshoot an issue to a colleague or friend. Did you find yourself struggling to put your thoughts into words? This is where the power of a screenshot shines. Screenshots provide visual clarity, making it easier to convey your message and eliminate misunderstandings. In a world where time is of the essence, efficient communication is key, and that’s where screenshotting steps in.
Mastering the Basic Screenshot Shortcuts
Before we dive into the more advanced techniques, let’s establish a solid foundation. Windows 11 offers some nifty keyboard shortcuts for capturing screenshots in an instant. Win + Shift + S summons the snipping bar, allowing you to select a specific area to capture. Print Screen captures your entire screen, while Alt + Print Screen focuses solely on the active window. These shortcuts are your first steps towards seamless screenshotting.
Snipping Your Way to Success: Snipping Tool and Snip & Sketch
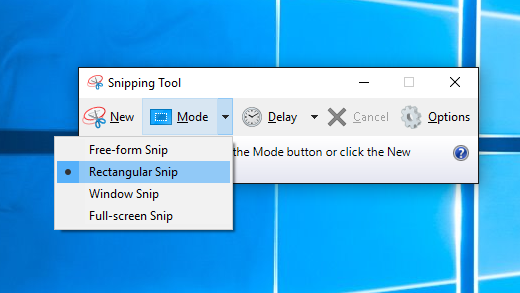
The trusty Snipping Tool from previous Windows versions has evolved in Windows 11. It’s now called Snip & Sketch, offering an array of screenshot options. With the Snip & Sketch tool, you’re not limited to rectangular snips; you can capture freeform shapes, full windows, and even specific application windows.
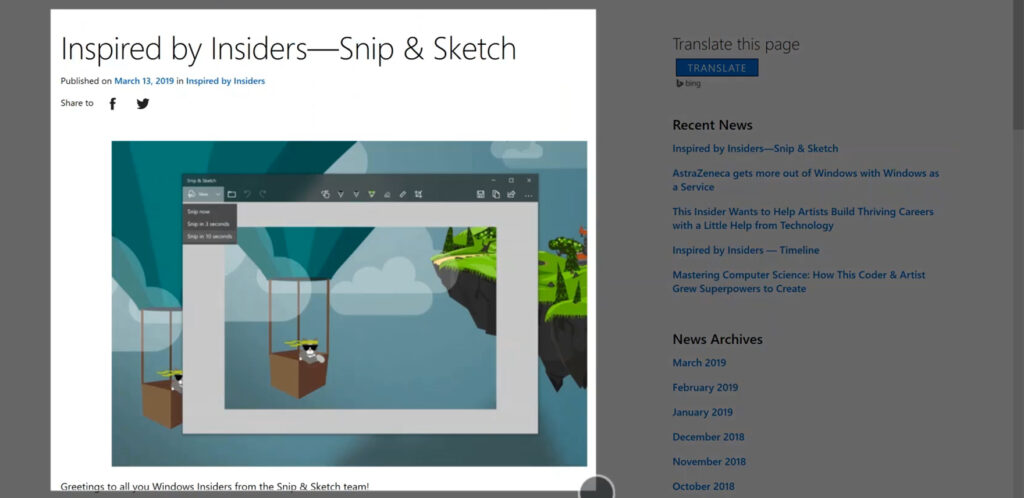
Embracing New Features in Windows 11 Snipping
Windows 11 takes snipping a step further by integrating new features. The Shift + Windows Key + S shortcut lets you snip your screen and immediately annotate the snip without opening a separate app. This streamlines your workflow, making it ideal for on-the-fly explanations or creative annotations.
The Flexibility of the Snip & Sketch Tool
Imagine you want to capture only a portion of your screen, not the entire canvas. This is where the Snip & Sketch tool comes into play. Snip & Sketch lets you capture a freeform or rectangular snip of your screen, providing flexibility and precision. Whether it’s highlighting a single UI element or emphasizing a particular section of a webpage, Snip & Sketch gives you the tools to snip your way to perfection.
Capturing More with Windows 11 Snip & Sketch Tips
Want to capture a drop-down menu or tooltip? The Delay feature in Snip & Sketch allows you to set a delay timer, giving you time to open menus and sub-menus before the snip is taken. This feature is a game-changer when you need to capture dynamic elements.
Going Beyond: Third-Party Screenshot Tools
While Windows 11 offers robust built-in tools, third-party screenshot utilities can take your efficiency to the next level. Tools like Greenshot offer extended functionalities such as capturing entire web pages, advanced annotations, and instant sharing to cloud services.
Snagit: Capturing Beyond the Basics
Snagit is a well-established screenshot tool known for its comprehensive feature set. It goes beyond simple screen capturing, offering powerful editing capabilities, including annotations, callouts, and even GIF creation. With its intuitive user interface and a wide array of capture options, Snagit is a favorite among professionals who require precision and creativity in taking a screenshot in Windows 11.
Lightshot: A Lightweight Gem
Lightshot is a lightweight yet effective screenshot tool that focuses on simplicity and speed. Its user-friendly interface allows you to capture specific areas or the entire screen seamlessly. What sets Lightshot apart is its quick editing features, enabling users to add annotations, highlights, and basic shapes before saving or sharing their screenshots.
Greenshot: Open-Source and Customizable
Greenshot stands out as an open-source screenshot tool that combines powerful features with a high level of customization. It offers various capture modes, including full screen, selected region, and even scrolling captures. Greenshot’s rich editing options and support for plugins make it a versatile choice for users who want tailor-made screenshotting solutions.
ShareX: Feature-Rich and Efficient
ShareX is a feature-packed screenshot utility that goes beyond basic screen capturing. It supports a wide range of capture methods, including full screen, window, region, and even scrolling captures. What makes ShareX exceptional is its automation capabilities – users can create workflows that automatically capture, edit, and share screenshots based on predefined conditions.
Screenpresso: A Versatile All-in-One Tool
Screenpresso prides itself on being an all-in-one screenshot tool that caters to various needs. It offers standard capture options alongside unique features like a built-in image editor, a media viewer, and even a video recorder. Screenpresso’s emphasis on multimedia makes it an ideal choice for those who often work with images, videos, and other media formats.
Comparing the Tools: What to Consider
When selecting a third-party screenshot tool, several factors come into play. Consider the features you need – advanced editing, quick sharing, automation, etc. Also, evaluate the user interface, as a tool that aligns with your preferences can significantly boost your efficiency. Compatibility with your operating system and the level of customer support provided are also important factors to weigh.
Leveraging Windows Snip & Sketch Tool
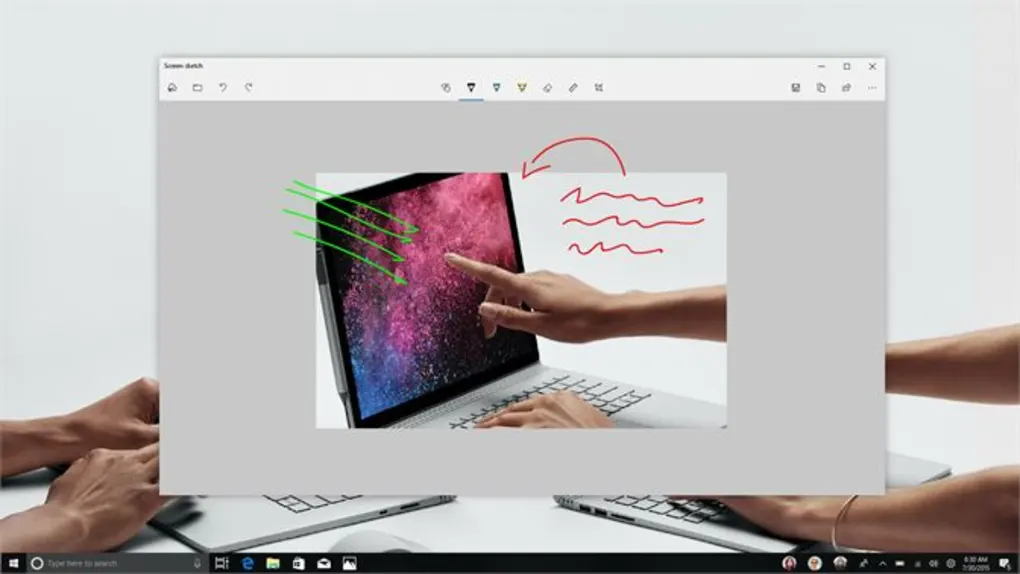
Let’s take a closer look at Snip & Sketch. Accessed by pressing Shift + S, this tool not only captures snips but also opens a user-friendly editor. Here, you can draw, annotate, and highlight key areas within your screenshot. It’s like having a digital marker in your hand, enabling you to emphasize what matters most.
Table: A Comparison of Screenshot Methods
| Method | Pros | Cons |
| Keyboard Shortcuts | Quick and easy | Limited to full screen or active window |
| Snip & Sketch | Precise snipping | Requires additional editing for clarity |
| Snipping Tool | Basic editing features | Limited functionality |
| Third-Party Applications | Advanced editing and capturing capabilities | Extra learning curve |
Organizing and Editing Screenshots Effectively
Accumulating a multitude of screenshots can quickly lead to a cluttered digital space. Learning to organize them systematically not only enhances your productivity but also ensures that valuable captures are always at your fingertips. File naming conventions and well-organized folders can go a long way in taming the screenshot chaos.
Creating Compelling Content with Your Screenshots
Screenshots shouldn’t just be static images – they can tell stories. Analogous to a painter using different brushstrokes to evoke emotions, you can use screenshots to craft compelling narratives. Arrange multiple screenshots cohesively to guide readers through a process, adding captions and annotations to create an engaging visual journey.
Enhancing Communication with Visuals
In a world where communication happens across various digital platforms, screenshots become your visual voice. From concise emails to comprehensive presentations, screenshots inject clarity into your communication. Remember, a picture is worth a thousand words, but the right picture is worth a thousand well-directed thoughts.
Screenshot Security and Privacy
While sharing screenshots is empowering, it’s crucial to be mindful of sensitive information. Always double-check before sharing, and consider using tools that allow you to blur or redact sensitive data. Your digital privacy is as valuable as the content you create.
Screenshot Organization: Creating a Visual Database
As you accumulate screenshots, organizing them becomes crucial. Create folders for different projects or topics, and within these folders, categorize screenshots based on their purpose. This visual database not only keeps your content tidy but also turns into a valuable resource for future reference. It’s like having a neatly arranged toolbox for various tasks.
Annotating for Clarity: Making Your Point
Sometimes, a raw screenshot isn’t enough to convey your message effectively. This is where annotations come into play. Annotations involve adding text, arrows, shapes, and highlights to your screenshots. They direct the viewer’s attention, explain intricate details, and ensure that your message isn’t lost in translation. Think of annotations as your digital pen, adding depth and clarity to your visuals.
Going Beyond Still Images: Recording Your Screen
While screenshots excel at capturing moments frozen in time, they fall short when it comes to showcasing dynamic processes. This is where screen recording shines. Need to demonstrate software usage, create tutorials, or report a bug? Screen recording is your go-to. Windows 11 even comes with a built-in Xbox Game Bar that can record not only games but also apps and your desktop.
Table: Pros and Cons of Still Screenshots and Screen Recording
| Method | Pros | Cons |
| Still Screenshots | Quick to capture | Limited for showcasing dynamic processes |
| Screen Recording | Demonstrates dynamic processes | Larger file sizes, may require editing |
| Ideal Use Cases | Capturing UI, images | Tutorials, bug reporting, software demonstrations |
| Explaining step-by-step procedures |
Screenshot-Ready: Optimizing for Different Scenarios
Not all screenshots are created equal. Depending on the context, you might need to adjust your approach. Are you capturing a webpage? Consider full-page screenshots to capture the entire content, even what’s not immediately visible. Are you showcasing an app? Opt for window-specific screenshots to focus solely on the application’s interface. Adapting your technique to the scenario ensures that your screenshots are tailored to their purpose.
FAQs
Q1: Can I use the Snip & Sketch tool to capture videos?<br> A1: No, Snip & Sketch is designed specifically for capturing images. For video capture, consider using dedicated screen recording software.
Q2: Are third-party screenshot tools safe to use?<br> A2: Reputable third-party tools like Greenshot are generally safe, but always download from trusted sources to avoid potential security risks.
Q3: Can I edit screenshots after I’ve taken them?<br> A3: Yes, you can edit screenshots using built-in tools or image editing software. Snip & Sketch also offers basic editing features.
Q4: How can I quickly share screenshots with others?<br> A4: Many screenshot tools offer direct sharing options to email, messaging apps, or cloud storage. Choose the method that suits your workflow.
Q5: What’s the difference between Snip & Sketch and the Snipping Tool?<br> A5: Snip & Sketch offers a more versatile snipping experience, including freeform and window snips, along with better annotation features.
Conclusion
Mastering the art of efficient screenshot capture and utilization can significantly boost your productivity and communication prowess. Windows 11 provides an array of built-in tools, but don’t hesitate to explore third-party options for added functionality. Remember, a screenshot isn’t just a static image – it’s a powerful tool for conveying ideas, guiding processes, and enhancing your digital interactions.

Jeremy Brosius is a Senior Editor for Comeover.io, a leading tech website that focuses on PC hardware and gaming. With a deep passion for technology and an extensive knowledge of the PC hardware scene, Jeremy has become a well-known figure in the industry.
To contact the author, please reach out via email.